Everything You’ll Need
| Tool/Material | Carpet Tile | Stretch-In | Glue-Down | Purpose |
|---|---|---|---|---|
| Utility Knife | ✔ | ✔ | ✔ | Cut carpet/padding |
| Tape Measure | ✔ | ✔ | ✔ | Measure dimensions |
| Straight Edge | ✔ | ✔ | ✔ | Guide straight cuts |
| Chalk Line | ✔ | ✔ | ✔ | Mark layout lines |
| Pry Bar | ✔ | ✔ | ✔ | Remove baseboards/flooring |
| Knee Pads | ✔ | ✔ | ✔ | Protect knees |
| Tack Strips | ❌ | ✔ | Optional | Secure carpet edges |
| Double-Sided Tape | ✔ | ❌ | ❌ | Adhere carpet tiles |
| Carpet Adhesive | Optional | ❌ | ✔ | Glue carpet |
| Staple Gun | ❌ | ✔ | ✔ | Secure underlay (wood only) |
| Seaming Tape & Iron | ✔ | ✔ | ✔ | Join seams |
| Knee Kicker | ❌ | ✔ | ❌ | Stretch carpet |
| Power Stretcher | ❌ | ✔ | ❌ | Stretch carpet |
| Stair Tool | ✔ | ✔ | ✔ | Tuck carpet edges |
| Carpet Roller | ✔ | Optional | ✔ | Press carpet firmly |
For concrete subfloors: cement filler, construction adhesive, masonry nails.
Quick Notes:
- Carpet tiles need tape or adhesive dots and don’t need stretching.
- Stretch-in wall-to-wall carpet needs a knee kicker and power stretcher.
- Glue-down carpet does not need a stretcher but requires adhesive and a roller to secure the bond.
Step 1: Removing Old Flooring
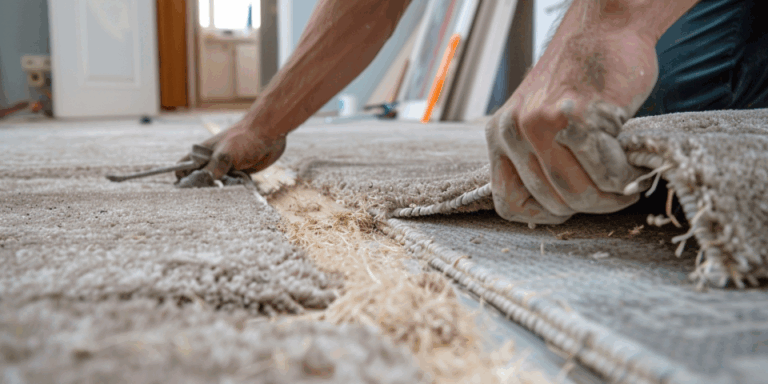
Before installing new carpet, remove your old flooring. Whether it’s carpet, wood, or tile, clear it all out. This prepares a clean surface for your new carpet.
Step 2: Subfloor Preparation
After removing old flooring, clean and prepare the subfloor. Check for damage or moisture, especially if installing carpet over concrete.
Fixing Damage and Uneven Areas
Find and fill any cracks, holes, or gaps. Use wood filler for wooden subfloors and sand smooth after drying. For concrete subfloors, use a cement-based filler. Level high or low spots with a leveling compound for a smooth surface.
Moisture Check
Check concrete subfloors for moisture to avoid mold or damage. Use a moisture meter to check levels. If high, use a moisture barrier or sealant to fix it. Proper moisture management ensures a durable carpet installation.
Step 3: Measuring the Room
Before you buy carpet, measure your room carefully. Measure the length and width, and include any corners or weird shapes in the room.
Add about 4 extra inches to your measurements to help with wall differences and cutting when laying the carpet.
Handling Odd Shapes
Odd shapes can make installing carpet tricky and change how it looks. Here are some common odd shapes you might see:
Alcoves and Bay Windows
Alcoves and bay windows can change the room’s usual shape. They need careful measuring and extra carpet pieces to cover them fully.
Closets and Doorways
Closets, especially big ones, and doorways can break up the carpet flow. Doorways need special edges for different floors, and closets might need small carpet pieces.
Angled Walls and Corners
Not all walls are straight. Angled walls and corners make cutting and fitting carpet harder. They need careful work to fit the carpet snugly.
Columns and Built-In Features
Columns or built-in things like shelves or fireplaces can get in the way. They need exact cutting to fit the carpet around them nicely.
Odd Room Shapes
Rooms shaped like an L or T need special measuring and cutting. This ensures the carpet fits well everywhere.
Steps and Staircases
If there are steps or stairs, it gets more complex. Each step needs its own carpet, fitting tightly and smoothly.
Nooks and Crannies
Small nooks and crannies can be missed but are important. Measure these spots carefully and use custom-cut carpet pieces to cover them.
Step 4: Calculating Square Footage
After measuring, find the room’s square footage by multiplying the length by the width. This tells you how much carpet to buy.
For example, if your room is 10 by 20 ft, multiply 10 by 20 to get 200 sq ft.
Step 5: Installing Tack Strips
Tack strips keep carpet edges in place on the floor. They have small nails that hold the carpet tight.
Tack Strips on Wood

To put tack strips on a wood floor, use a hammer or nail gun to secure them. Space them evenly around the room, leaving a small gap from the wall.
Tack Strips on Concrete

Installing tack strips on concrete floors is a bit different.
First, apply construction adhesive to the strip’s back and press it onto the floor. Then, use masonry nails to secure it.
Step 6: Choosing and securing the Right Underlay
The underlay, or carpet pad, adds extra cushioning and insulation for your carpet. Position it perpendicular to the carpet direction when laying it.
Types of Underlay
There are different types of underlay, each offering various comfort and support:
Foam Underlay
Foam underlay is popular because it is lightweight and affordable. It provides soft cushioning and absorbs impact, ideal for areas with heavy foot traffic.
Rubber Underlay
Rubber underlay is very durable and resilient. It supports the carpet well and reduces noise between floors, perfect for multi-level homes or apartments.
Felt Underlay
Felt underlay is known for its luxurious feel and sound-absorbing properties. Made from compressed fibers, it offers plush cushioning and a quieter living environment.
Secure the Underlay
Use a staple gun to secure the underlay to the floor, making sure it lies flat and smooth. Overlap the edges to avoid gaps or seams showing through the carpet.
Factors to Consider when Choosing Underlayment
| Aspect | Consideration |
|---|---|
| Carpet Type | Different carpets may need different underlay for the best results. |
| Level of Foot Traffic | Choose a denser underlay for high-traffic areas to prevent flattening or compressing. |
| Noise Reduction | Pick underlay with sound-absorbing properties, like rubber or felt, to minimize noise between floors. |
| Special Requirements | If using underfloor heating, select an underlay with good thermal insulation for better energy efficiency and heat distribution. |
Step 7: Cutting the Carpet
Cutting the Carpet
Make sure your carpet fits the room well before putting it down. Cutting it right is key for a nice look. Here’s how to do it:
Measuring and Marking
- Spread the carpet in the room where it will be placed.
- Leave a bit of extra carpet at the edges for trimming.
- Use chalk or a pencil to mark the back of the carpet to help with cutting.
Techniques
- Straight cuts: Use a utility knife and a straightedge to cut along the lines. Press firmly for a smooth cut.
- Corner cuts: For corners, make diagonal cuts from the corner to help it fit well between walls.
- Trimming excess: After cutting the main pieces, trim extra carpet at the edges with a utility knife. Make careful cuts for a tidy finish.
Extra Tips
- Double-check your measurements before cutting to avoid errors.
- Take your time; be patient and precise while cutting carpet.
- Change dull blades often for smooth cuts.
- Cut away from your body and keep fingers safe from the blade.
Step 8: Stretching the Carpet
Stretching the Carpet
Use a knee kicker and carpet stretcher to pull the carpet tightly across the room for a snug fit. Start in the middle and move toward the edges, using the knee kicker to attach the carpet to the tack strips.
Installing a Door Bar
After laying the carpet, place a door bar at doorways or thresholds. This makes a smooth transition between rooms and keeps the carpet in place.
Step 9: Seaming Carpet
Seaming Carpet
Carpet seams should be snug, flat, and not easy to notice. Here are some easy tips:
- Use a knee kicker to push the carpet into the edges and seams. Begin in the middle and work out to the walls.
- Apply seam sealer to the carpet edges before joining them. This prevents unraveling.
- Press the seam together with a seam roller. Roll from the center to the sides.
- Avoid putting seams in busy areas. If needed, make sure they run across the main traffic path.
DIY vs. Professional Carpet Installation
Before starting your project, decide whether to do it yourself or hire a professional.
| Option | Pros | Cons |
|---|---|---|
| DIY Installation | – Costs less – Do it on your own time – Feel proud | – Need special tools – Hard to learn – Mistakes can be costly (wrinkles, bad seams) |
| Professional Installation | – Perfect finish – Quick and skilled – Often comes with warranty | – Costs more – Less flexible timing |
DIY is best if:
- You’re installing carpet tiles or in small areas.
- You have or can rent the right tools.
- You’re good at measuring, cutting, and stretching carpet.
Hire a pro if:
- The area is big or oddly shaped.
- You’re using stretch-in or glue-down carpet.
- You want results that last.
✅ Tip: Even if you DIY, think about hiring a pro for tough tasks like stairs or tricky seams.
Need help with carpet installation?
Our flooring installation team can handle everything — from getting the subfloor ready to perfect carpet stretching and seaming.
You can request a free estimate today and let us make it easy!
Common mistakes to avoid when installing carpet
Avoid errors like not preparing seams well, which can make carpet lines or gaps visible. Take your time with each step.
- Poor seam preparation: This can create lines or gaps. Align and secure seams correctly.
- Skipping subfloor cleaning and leveling: This results in uneven surfaces. Ensure the subfloor is clean, dry, and smooth.
- Incorrect measurements: You could purchase too much or too little carpet. Double-check dimensions and account for irregularities.
- Wrong underlay choice: A mismatched underlay reduces durability and comfort. Select one that fits the carpet and room.
- Improper tack strip installation: This leads to loose edges and shifting carpet. Secure tack strips around the edges.
- Not stretching the carpet: Skipping a knee kicker or power stretcher causes wrinkles. Always stretch for a snug fit.
- Ignoring room conditions: High humidity or temperature changes can cause expansion or contraction. Prepare the room first.
- No expansion gap at walls: This causes buckling. Leave a small gap between the carpet and walls for expansion.
Do You Need Help With Your Carpet Installation Project?
Now that you know how to install carpet flooring, you’re ready to create a cozy spot. But if you’d like experts to do it, we’re here to help.
Our flooring installation team can handle everything — from preparing the subfloor to perfect carpet stretching and seaming — so you can relax and enjoy great results. We’ll help you choose the right carpet style and padding for your home and budget. For a closer look at costs, visit our Carpet Flooring Cost Guide to plan your project.
Contact us today to book your free in-home consultation and check if we serve your area.